Curing Silicone in SLA UV Molds – Part 2
After my last failure to get a proper cure in my SLA printed masters, I reached out to my local distributor and Smooth-On to see if they had any recommendations for improving the quality of the curing.
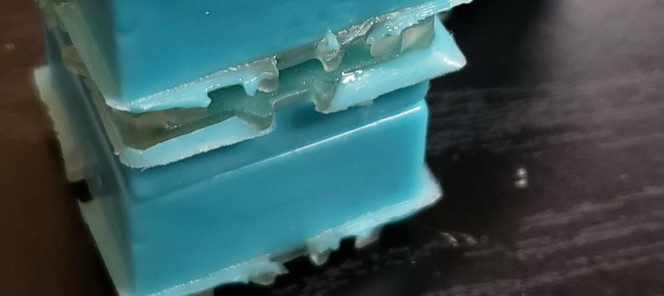
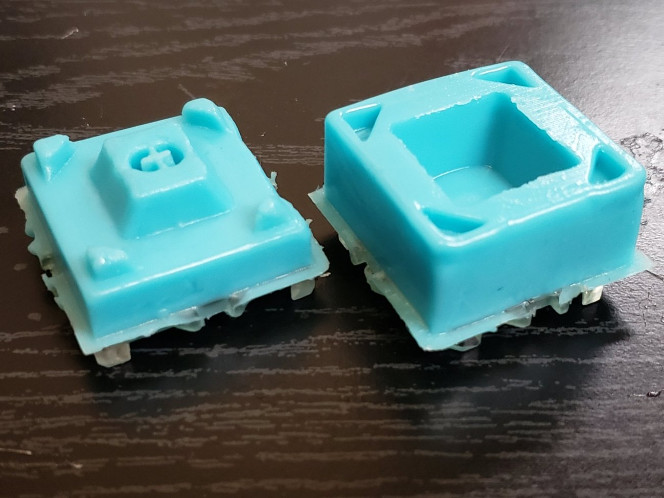
It turns out photopolymer resin is fundamentally incompatible with platinum silicone curing, and while this can be mitigated to some degree by the finishing process (especially heat treatment), a boundary layer of uncured silicone is still present where the mold comes into contact with the master.
There’s a Product for That
The technical staff at Smooth-On were very helpful in explaining that they normally don’t recommend using platinum cure silicones in SLA prints, but that if I insisted, I should try their products Inhibit X and XTC-3D. I’m afraid I had to insist!
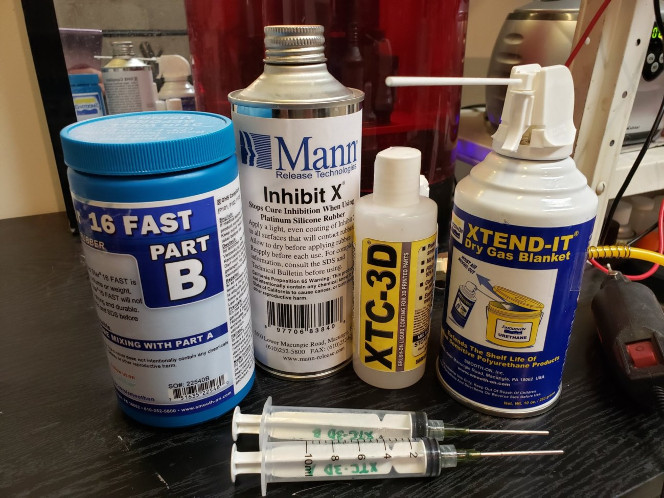
Inhibit X (MSDS) is a very thin, clear liquid with copious flammability and explosiveness warnings that brushes onto the SLA part and reacts somehow with it. It applies very smoothly and retains all detail, leaving even small imperfections like the print striations clearly visible in the finished part. It should not appreciably change the shape of anything, so it’s very good for molding. You apply it liberally in at least two coats, allow time to dry, and then cover with Mann Ease Release if you’d like. Edit: Better yet, if you can fit your part in a jar with it, soaking the part for 5 minutes works absolute wonders.
It’s not the cheapest chemical, but you absolutely get what you pay for. After performing my finishing process from part 1 and applying only Inhibit X to test, my molds cured to a very nearly usable state.
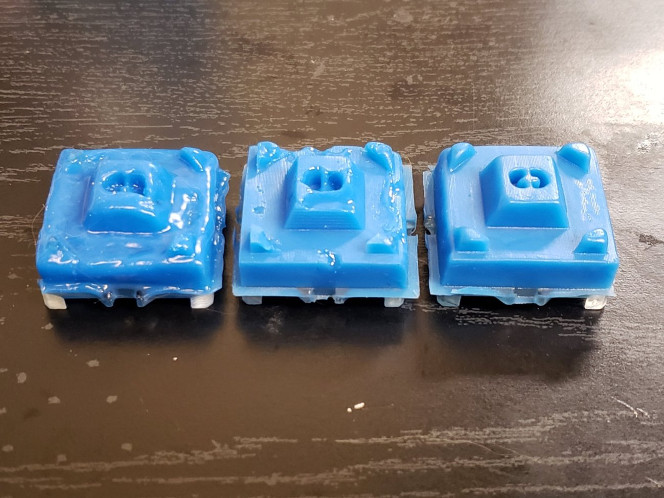
To make the molds work even better, I then added XTC-3D (MSDS) to the process, applying it before the Inhibit X. This is a very inexpensive, clear two-part substance that you mix together and then coat onto the part. It is self-leveling and provides a very pleasant visual finish once dry, smoothing out any striations and imperfections. It has the added benefit of providing additional insulation against cure failures, allowing Inhibit X to really do its work. You can also create some pretty awesome stuff by mixing colors and metal powders into the XTC-3D for some very impressive part finishes on your other prints.
While I don’t necessarily care about striations on my mold since the areas where the silicone contacts the SLA part are not essential to the shape, the XTC-3D is cheap enough that the added layer of protection is often a straightforward choice. While it does change the shape and tolerances of your master slightly, you can generally apply it in a thin enough coat for it not to be a problem, or you can thin the solution further with Epic Epoxy Thinner (MSDS). I like to blast any fine details with an air gun while the thinned XTC-3D tacks to ensure there’s no buildup in small corners. Edit: With a long enough Inhibit X soak, you really don’t need this. It’s neat to have around, though.
Use a Faster Curing Silicone
Another way to beat silicone’s reluctance to cure in the prints is with a much faster cure. Mold Star 30 (MSDS) takes 6 hours to cure, but if you’re willing to sacrifice pot life, Mold Star 16 FAST (MSDS) only takes 30 minutes and seems to work better in general with SLA prints. I am extremely satisfied with the results.
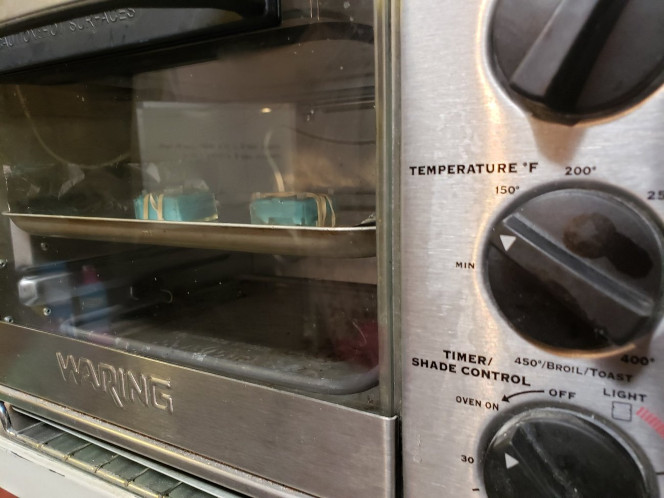
To cure even faster, you can hold the temperature a little higher during the curing process. Higher temperatures significantly reduce the pot life and cure time of platinum cure silicones, so I like to vacuum degass and pour my silicone at room temperature but then place the masters into the toaster oven under gentle heat to really expedite the process and ensure a great cure.
Go for It
So there you have it: If you want to use platinum cure silicone with an SLA master, just do this:
- Isopropyl alcohol bath/scrub
- Water rinse
- Air Dry (can speed this dry up with an air gun)
- Bake (recommend 200F for ~3 minutes)
- UV cure (follow resin directions)
- Optional Smooth-On XTC-3D coat (optional Epic Epoxy Thinner, watch out for small details and corners)
- Cure 4 hours if using XTC-3D
- Mann Inhibit X coat/dip
- Air dry
- Mann Inhibit X coat/dip
- Air dry
- Mann Inhibit X coat/dip
- Air dry
- Mann Ease Release 200 coat (brush into all fine details)
- Air dry
- Mann Ease Release 200 coat (light spray)
- Dry
- Fill with degassed Smooth-On Mold Star 16 FAST
- Keep warm or bake at low temperature (recommend 125F for 30 minutes)
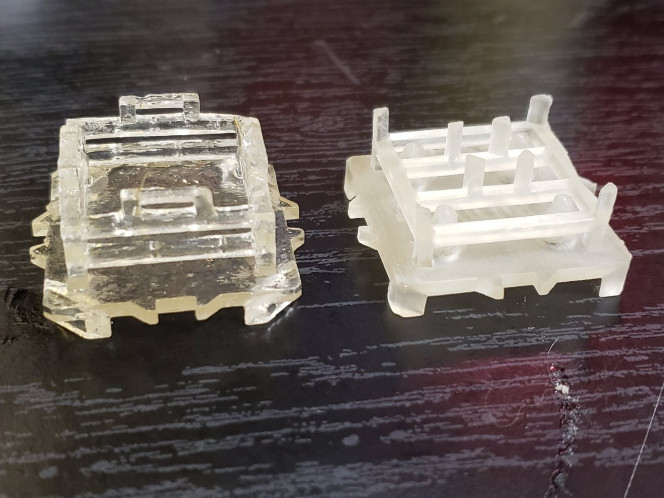
This process turns out a great mold every time with ELEGOO translucent resin on my SparkMaker SLA printer.
I’ll now be moving on to pressure casting finished parts in these, which I’m sure will present plenty of new challenges and solutions.