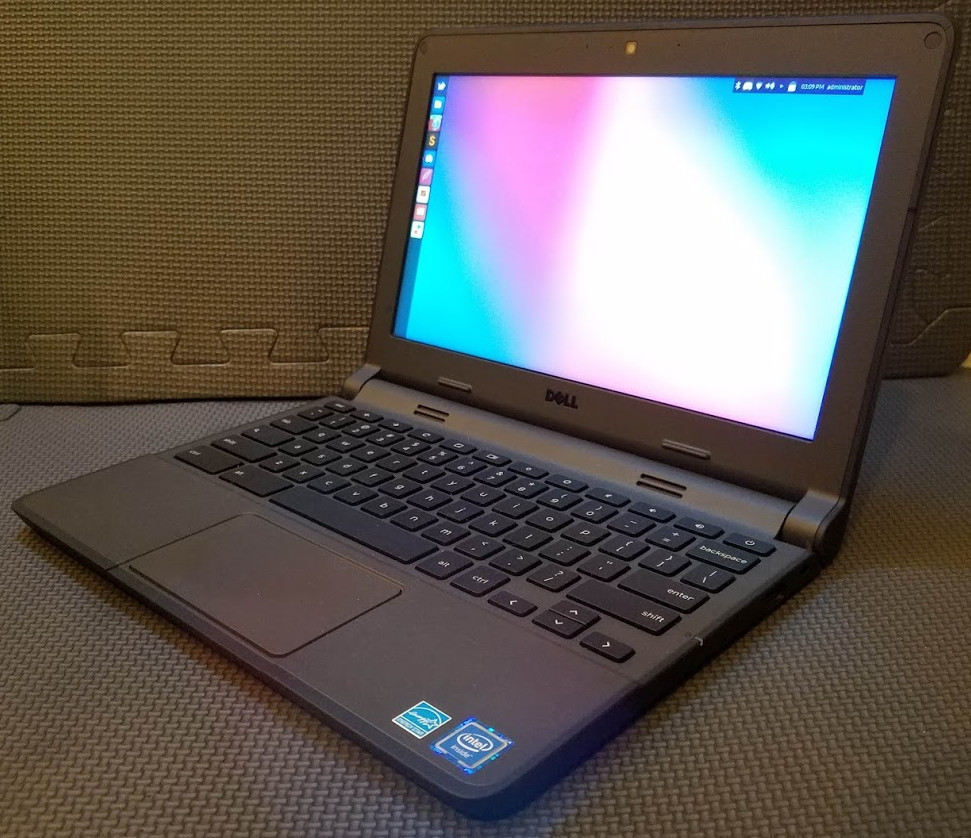
GalliumOS on a Dell Chromebook 11 3120 (Candy)
This post covers installation and usage impressions of GalliumOS on the Dell Chromebook 11 3120. To jump straight in, skip to Before You Start.
Why the Chromebook?
With November around the corner, I needed a decent laptop to attend National Novel Writing Month meetups. Much as I love my MSI GS73VR, a gaming laptop of its size doesn’t fit in most backpacks and only manages an hour on battery. It also telegraphs “steal me, I’m expensive” from across the room. The ideal laptop for NaNoWriMo, in my mind, is a highly portable, durable beater with extreme battery life and just enough power for work at the absolute lowest price point possible (preferably while not looking like crap). Luckily, just such a laptop exists, and currently goes for about $100: The Dell Chromebook 11 3120.
Why GalliumOS?
Unfortunately there’s that word “Chromebook” in there, which is great for a whole lot of people, but a deal breaker for me even as a web developer. I love the concept and all, but would be lost without git, apache/nginx, node, Sublime Text, GIMP, and InkScape. Plus the cross-platform novel writing software I’m using, Manuskript, doesn’t have a web version.
Chromebooks can run Linux on top of ChromeOS using a tool like Crouton, but some can go even farther and will run a full-on reinstall or even dual boot. GalliumOS is a distro specifically for Chromebooks. It combines the small size and lightweight memory footprint of Xubuntu (Ubuntu running XFCE as its Desktop Environment) with a collection of drivers, optimizations, and bug fixes specific to Chromebooks. The maintainers keep an excellent hardware compatibility list so you can know in advance which Chromebooks it will work with and what problems you may encounter.
Before You Start
You will need:
- Small phillips head screwdriver
- Spudger or other prying device
- One blank flash drive for GalliumOS image
- One additional flash drive (may already contain files) for firmware backup
Installation Instructions
The Dell Chromebook 11 3120 can run Linux via Crouton in developer mode, dual boot via a legacy boot mode, run a new OS while retaining ChromeOS’s recovery mode, or have its firmware replaced with a new UEFI ROM which completely removes ChromeOS and effectively makes it a normal computer. This tutorial will cover the last option, as I have no intention of ever using this machine with ChromeOS and it has basically no resale value anyway. The last option also has the benefit of better hardware support, as some services like sound will not work on this machine with RW_LEGACY dual booting.
The short version of the steps, each of which will be covered in more detail below, is:
- create a bootable GalliumOS flash drive
- open the Chromebook and remove the firmware write-protect screw
- enable developer mode
- download and run the ChromeOS Firmware Utility Script
- choose Install/Update Full ROM Firmware
- back up existing firmware
- reboot and install GalliumOS
- customize
Creating a GalliumOS Flash Drive
Download the appropriate system image from GalliumOS’s downloads page (the Dell Chromebook 11 3120 uses the “Bay Trail” image) and use your favored method of imaging it as a bootable flash drive. I personally like Etcher since it’s extremely simple and works on Windows, Mac OS, and Linux.
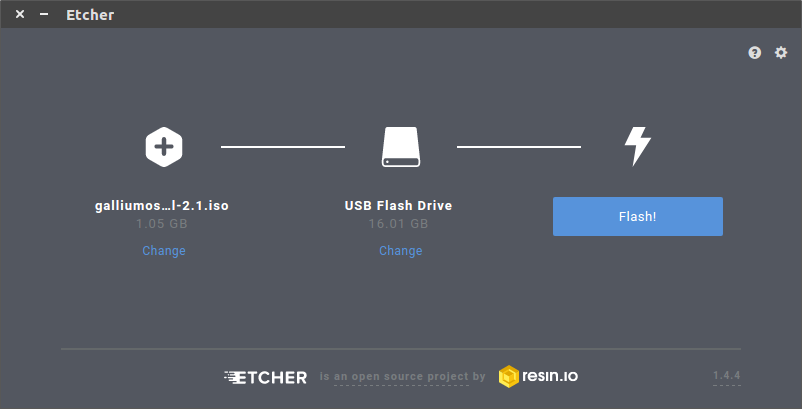
Once the drive is imaged, set it aside. We’ll come back to it shortly.
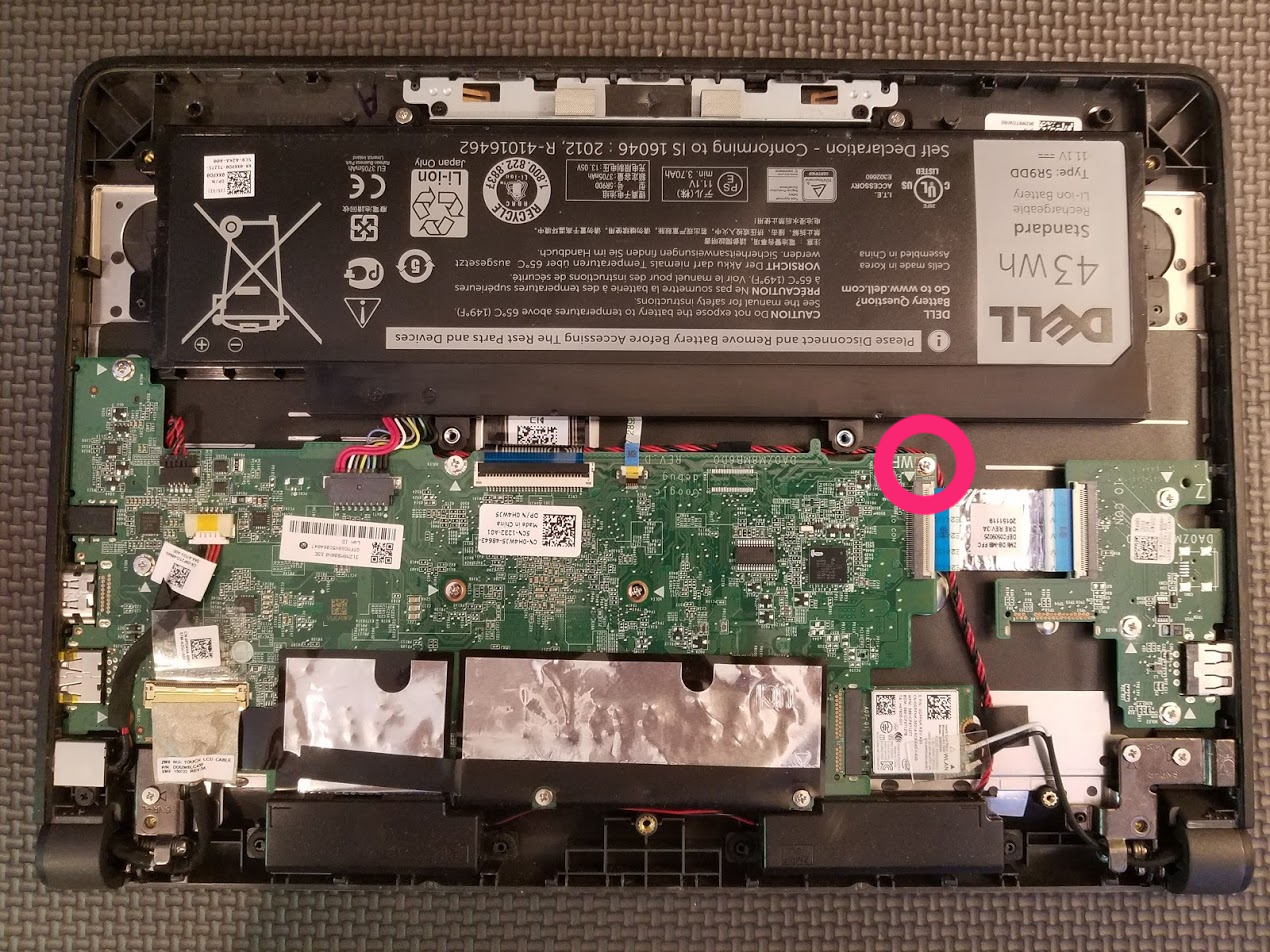
Removing the 3120’s Write-Protect Screw
The Dell Chromebook 11 3120 has seven screws on its bottom plate in the following positions:
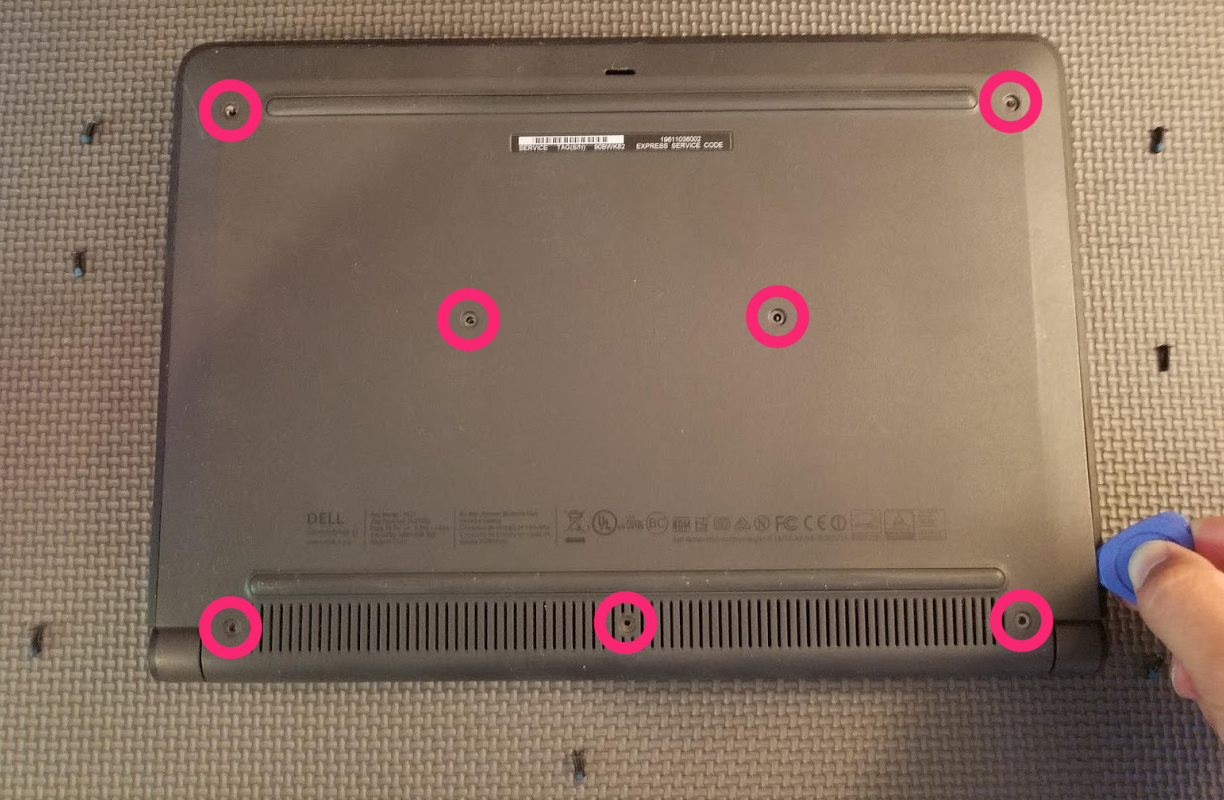
Once the screws are out, you will need a prying tool to remove the bottom cover. Start at the sides toward the screen and work your way toward the touchpad on each side with a spudger.
Next, locate the screw labeled WP. This is the firmware write-protect screw. Remove it and… realistically throw it in the trash. Honestly, are you ever really going to revert this thing to factory?
Enabling Developer Mode
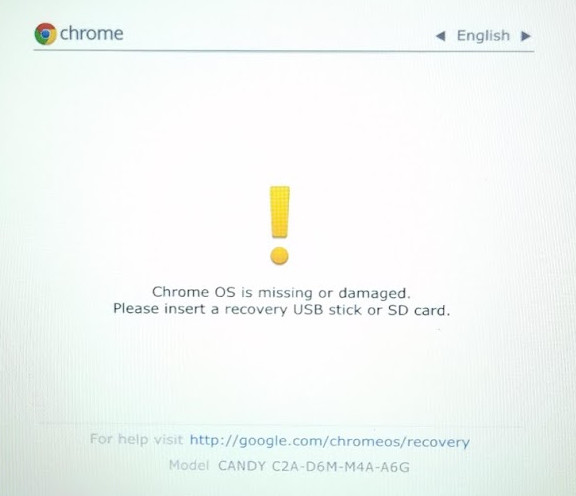
In order to flash your firmware, your Chromebook will need to be in Developer Mode. With the power on, hold Esc + Reload and then tap the power button. The screen should go blank, then load into Recovery Mode with a message about ChromeOS being “missing or damaged” (don’t worry, it isn’t really–that’s what this mode will always say, and we’re just visiting).
Next you turn off OS verification, but first be warned that this will delete all of your data. If you need anything backed up, STOP NOW. Hold Ctrl and tap D to turn off OS verification and press Enter to confirm.
The Chromebook will now reboot. Wait 30 seconds and you’ll hear two beeps, followed by another reboot. It will then factory reset the device, followed by another reboot. Now, the Chromebook will always boot to an “OS verification is OFF” screen for 30 seconds (which you can bypass at any time with Ctrl-D) before booting into ChromeOS.

Note: If you run into a screen saying “The device owner has disabled developer mode,” you may just need to complete the device setup wizard. Try completely setting up your user, then repeating this section. If you still get this screen, it’s possible your Chromebook was used in a school and not decommissioned properly. See chrome://system and chrome://policy to see if management or device policies have been set up. If they have, it may still be possible to contact the school district and Google support to decommission your device. If not, sorry but you may be screwed. Enjoy your stock Chromebook.
Flashing the Custom Firmware
Once your desktop comes back up in developer mode, connect to the internet in the install tutorial, then hit Ctrl-Alt-F2 (right arrow/forward) to get to a root terminal and log in as “chronos”:
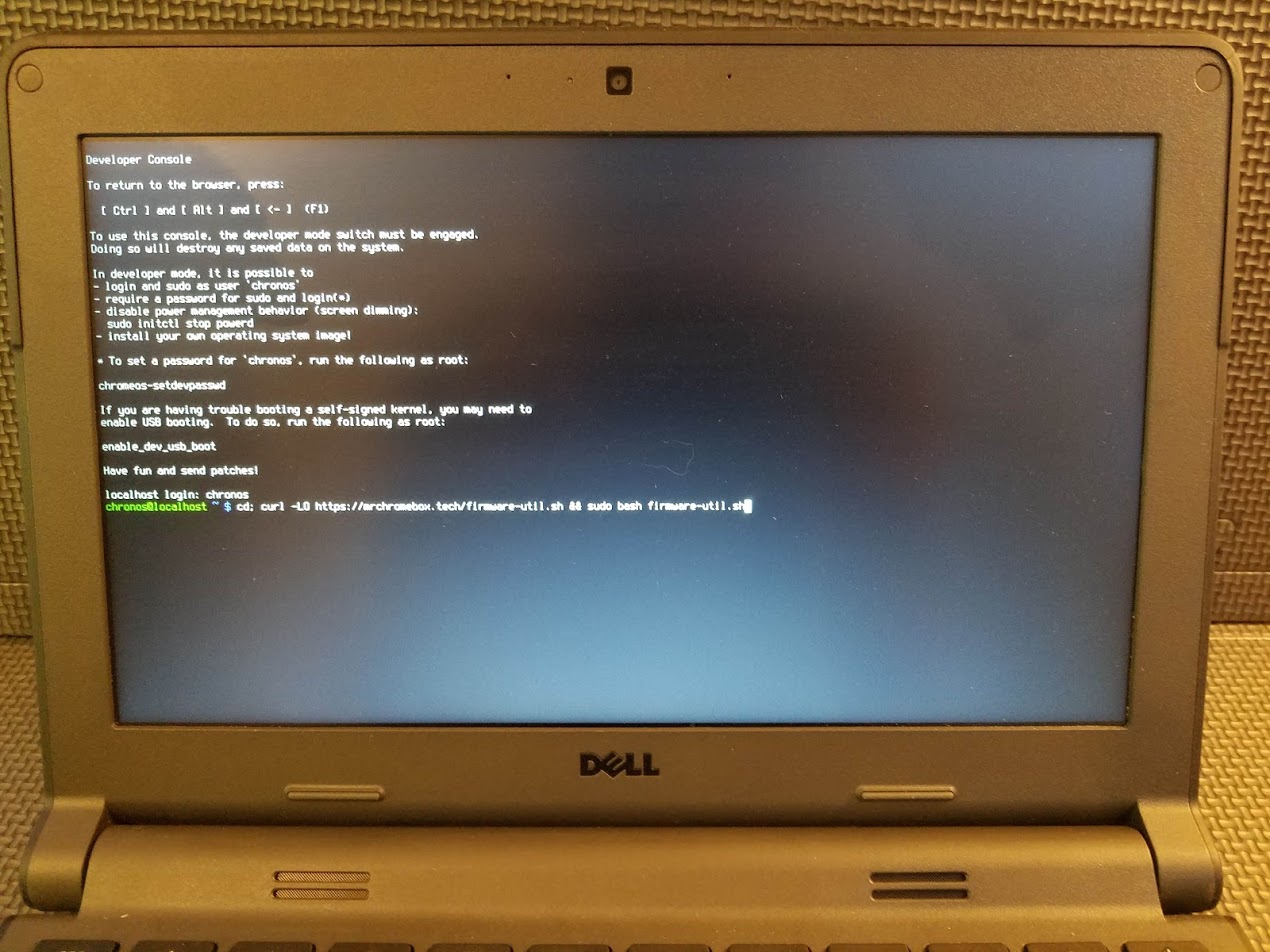
Next, download and run the ChromeOS Firmware Utility Script from MrChromebox.tech using the following command (the -LO is a capital O, not a zero):
cd; curl -LO mrchromebox.tech/firmware-util.sh
sudo install -Dt /usr/local/bin -m 755 firmware-util.sh
sudo firmware-util.sh
You should see the following screen:
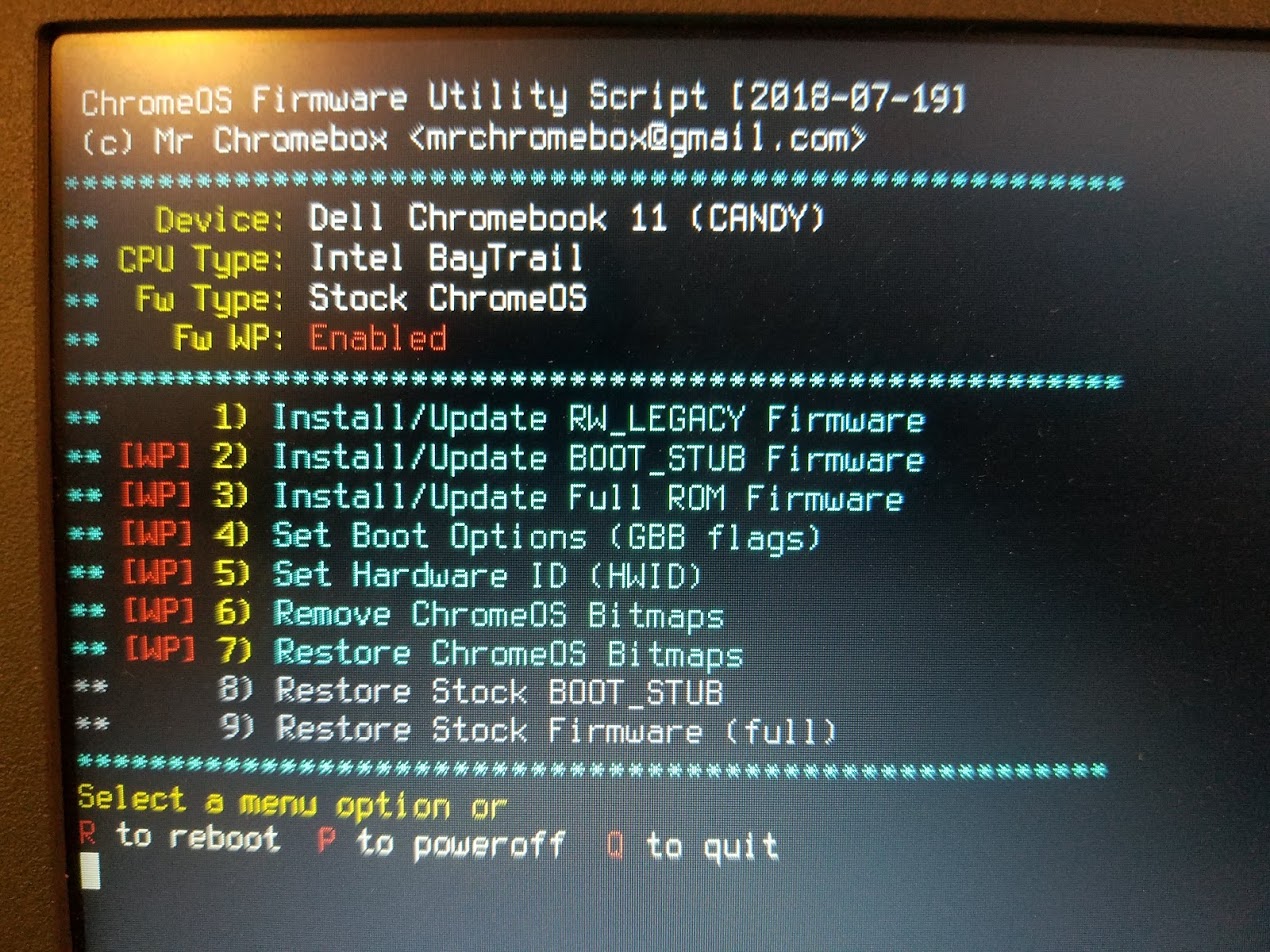
Insert your flash drive to back up your firmware. Choose option 3, “Install/Update Full ROM Firmware” and accept the option to back up your firmware when it is offered. This file should be placed somewhere for safe keeping, so consider moving it to your backup solution once it’s safely onto the flash drive.
Updating the firmware takes about a minute. When the process is finished, insert your GalliumOS flash drive and restart the computer.
Installing GalliumOS
From here the process is much like installing any Linux distro. Let the computer start up with the bootable flash drive, then click the “Install GalliumOS 2.1” icon on the desktop. Once it’s finished, remove the flash drive as instructed and your new Gallium… book? is complete!
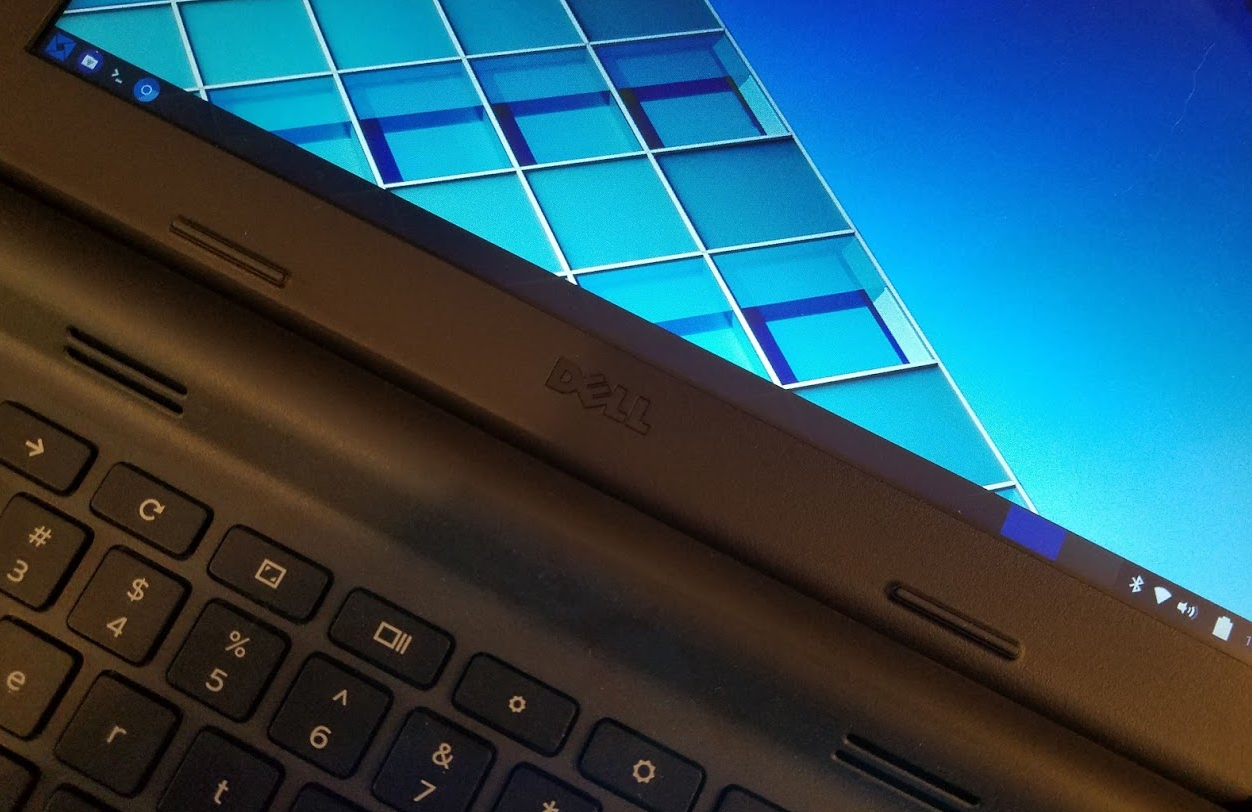
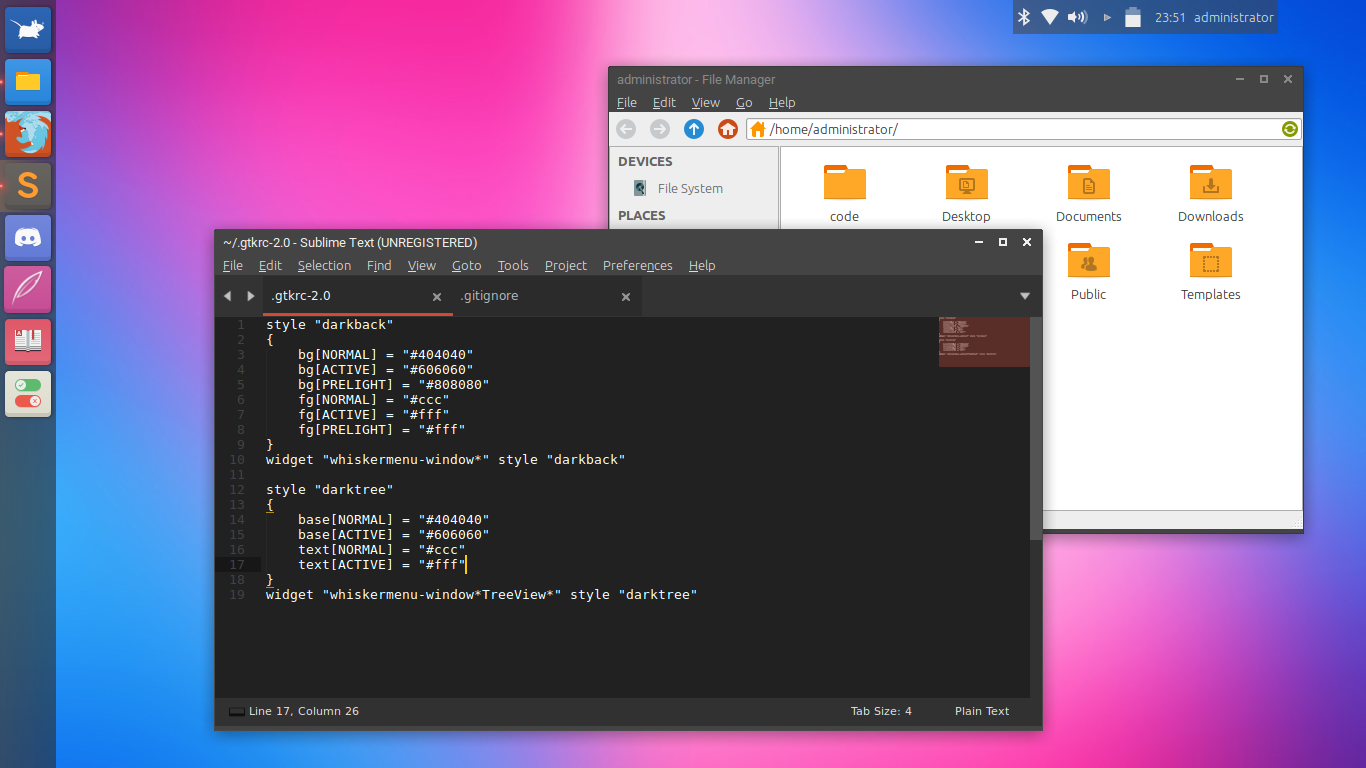
All that’s left after that is to customize the desktop to your liking. Here’s a screenshot of my finished desktop, which uses plank for its dock, numix-gtk-theme for its GTK theme, numix-icon-theme and numix-icon-theme-square for its icon themes, and a custom GTK config for the whisker menu from Graeme’s Blog:
Usage impressions
Overall, it’s reasonably snappy for what it is. Here’s what $100 got me broken down into data:
- Boot to desktop: 34.72s
- Desktop from suspend: 1.20s
- Open Firefox: 5.28s
- Open LibreOffice Writer: 2.31s
- GtkPerf benchmark: 5.12s
- Real-world battery life: 7h